
Setting up routing · menu
Dashboard
Setting up routing
How to decide which model serves your traffic, from the console. Connect a provider, optionally add deterministic rules, then pick an automated mode and tune it. For the concepts behind routing, see the Routing reference.
First, connect a provider
Routing targets have to be real, connected models, so start on the Models page (sidebar → Connect → Models). This is where provider keys live.
- Pick a provider in the left list, or use + Add provider for a custom OpenAI-compatible one.
- Enter the API key (for AWS Bedrock, the access key, secret, and region) and save. Keys are stored encrypted and never returned to the browser.
- Click Test connection to confirm it works. A green banner shows the model that answered and a sample reply.
- Click Discover models, tick the ones you want, and Import selected. Non-chat models (embeddings, rerankers) are unticked by default.
Sync Models (top-right) refreshes pricing from the LiteLLM catalog and pulls in LiveBench and LMSYS Arena scores, so the registry and the model comparison views stay current. Each model row can be expanded to see pricing, capabilities, benchmark scores, and a per-model Test button.
With no keys connected, Arbr runs on seeded data and every page works, but live routing is disabled until you connect at least one provider.
Deterministic rules
Open Routing (sidebar → Route → Routing). The Rules tab is for hard mappings: this condition always uses this model. Rules are deterministic, and they always win over automated routing.
In Create a rule:
- Set When to a task type, an application, or a workflow.
- Type the value it should match in Equals (for example,
classification). - Pick the target Provider and Model.
- Leave Enable now checked and click Add rule.
The rule appears in the table below, where the On toggle enables or disables it live and Delete removes it. Rules are optional. Most teams rely on automated routing and add a rule only for a specific override.
Automated routing
The Automated routing tab decides the model in auto mode, which is when a caller sends model: "auto", no model, or one that isn't available. A pinned, connected model is always honored, and a matching rule always wins first.
Pick one of three modes. Selecting a mode applies it immediately, with no separate save:
| Mode | What it does |
|---|---|
| Off | Auto-mode requests just use the default model, after any matching rule. |
| Cost guardrail | A heuristic that downgrades premium models on cheap task types, following the policy you set. |
| Default AI policy | An AI-generated task → model map decides, with per-request classification when no task type is sent. |
There's also a Clear response cache button here. Identical repeat requests are served from cache before routing runs, so clear it when you're testing a change.
Tuning the cost guardrail
When the mode is Cost guardrail, a policy editor appears below:
- Mode: Conservative downgrades only premium-tier models. Aggressive downgrades anything costlier than the target.
- Eligible task types: tick the cheap task types that should be downgraded when matched.
- Downgrade target per provider: for each connected provider, choose the lighter model that eligible tasks fall back to.
Click Save policy, or Reset to defaults to restore the shipped settings.
Generating an AI routing policy
When the mode is Default AI policy, Arbr assigns a model to each task type from your available models. You generate a starting point, review the projected impact, then hand-tune it.
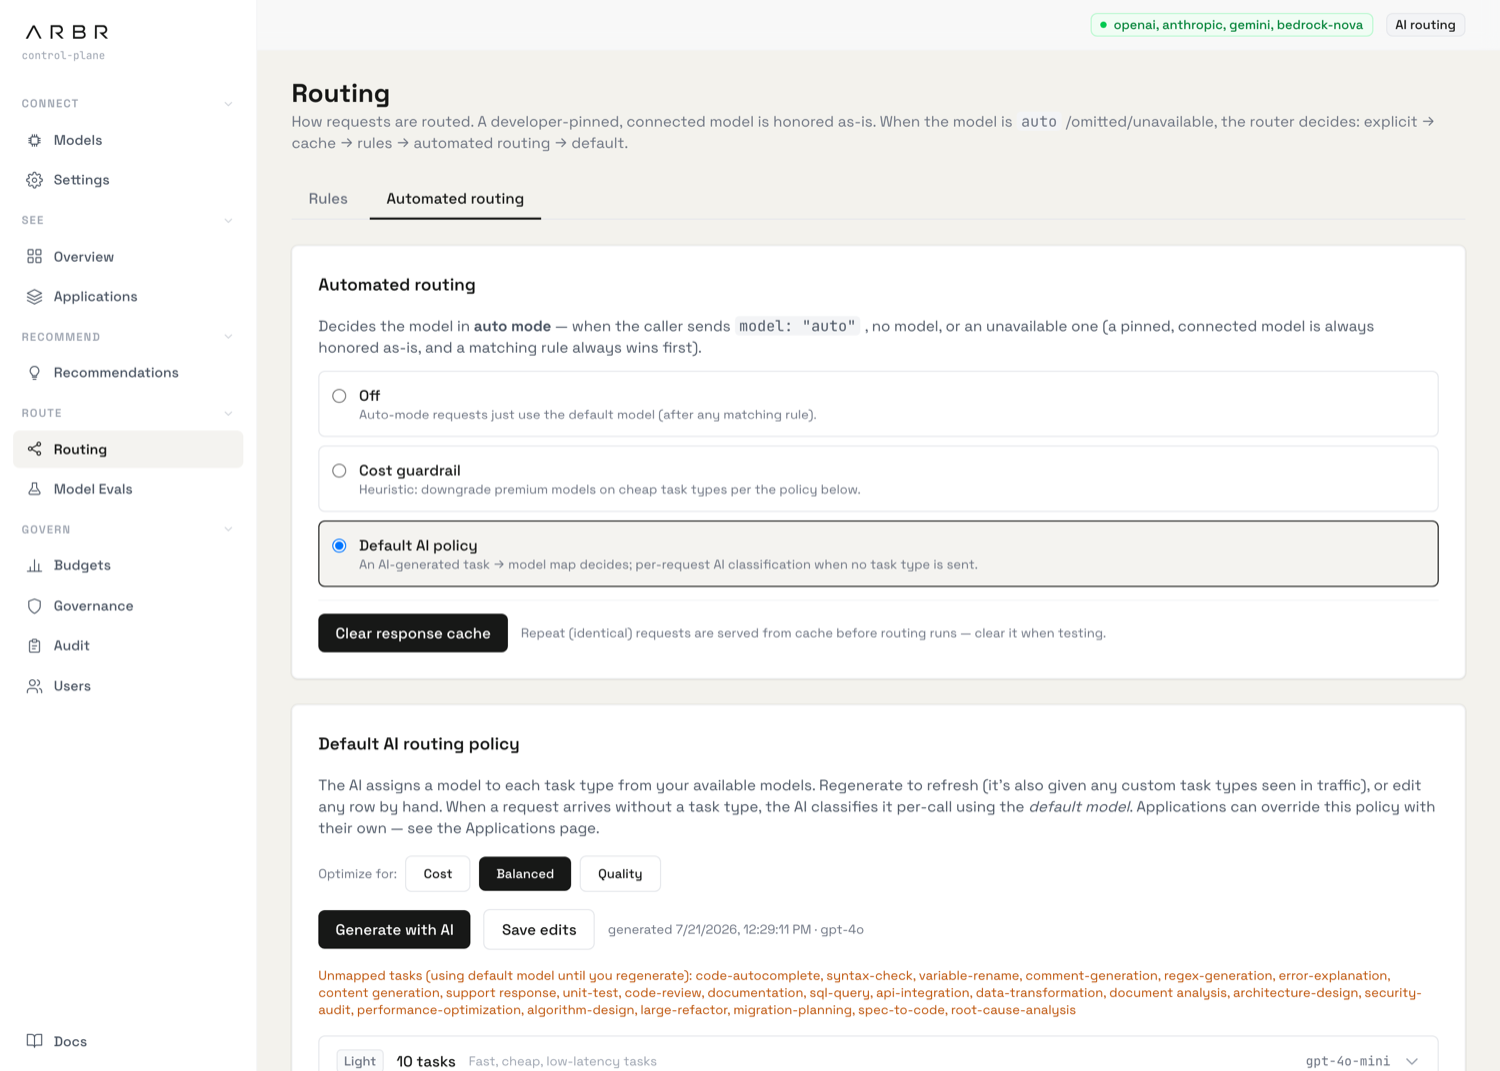
- Choose an Optimize for goal: Cost, Balanced, or Quality.
- Click Generate with AI and confirm. This overwrites the current assignments with AI-generated ones (it can't be undone, so it asks first).
- Review the Projected impact panel: projected cost against current cost, a capability index, and a per-task preview of what changed. Click Re-simulate after any manual edit to refresh it.
- Fine-tune in the Light, Medium, and Complex tier cards. Expand a tier and change any task's model from the dropdown ("(use default)" leaves it on the default model).
- Click Save edits to persist manual changes.
Any task type without an assignment falls back to the default model, and is flagged so you know to regenerate. When a request arrives with no task type, Arbr classifies it per-call using the default model.
Per-application overrides
A single application can route differently from the global policy. Open it from the Applications page and go to its Routing policy tab. There you can restrict the app to a subset of allowed models (anything deselected is blocked at the gateway) and generate a policy tuned for that app's own traffic, with the same Cost / Balanced / Quality goal and projected-impact preview.
Putting it together
- Connect a provider and import its models (Models page).
- Add any deterministic rules you need (Routing → Rules).
- Pick an automated mode (Routing → Automated routing).
- Generate and tune the policy, checking the projected impact.
- Clear the response cache and send test traffic to confirm the routing.
Every decision is reversible from the dashboard in seconds, and each served request records which rule or policy decided it, visible in the request log.